|
|
Post by Northy on Sept 21, 2005 18:30:46 GMT
DO NOT rush gluing the prop shaft!
I have glued these in the past. You must make sure all the bits are grease free (use motor cleaner), and ensure the thing is as straight as possible. Keep checking it while it dries, it will make a bit difference to the transmission.
Thats number 1. ;D
|
|
|
|
Post by Northy on Sept 21, 2005 18:40:05 GMT
No. 2
Threadlock the two M3 x 10mm studs into the top rear wishbones.
EDIT: - Infact threadlock the studs into all the wishbones.
|
|
|
|
Post by Northy on Sept 25, 2005 14:06:46 GMT
No. 4
Fit some decent silicone shock seals when you build the shocks. I got standard black ones in the kit and they had too much "sticktion". I fitted some MIP blue silicone ones in the front shocks at the first meeting I went to and it made the shocks much better. I'll be fitting them in the back ones next time I take them apart.
|
|
|
|
Post by Northy on Sept 25, 2005 14:24:47 GMT
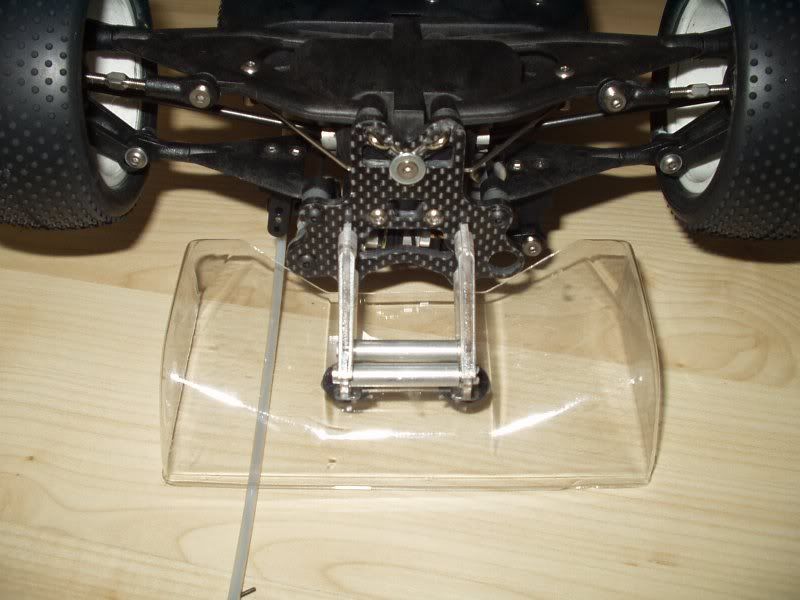
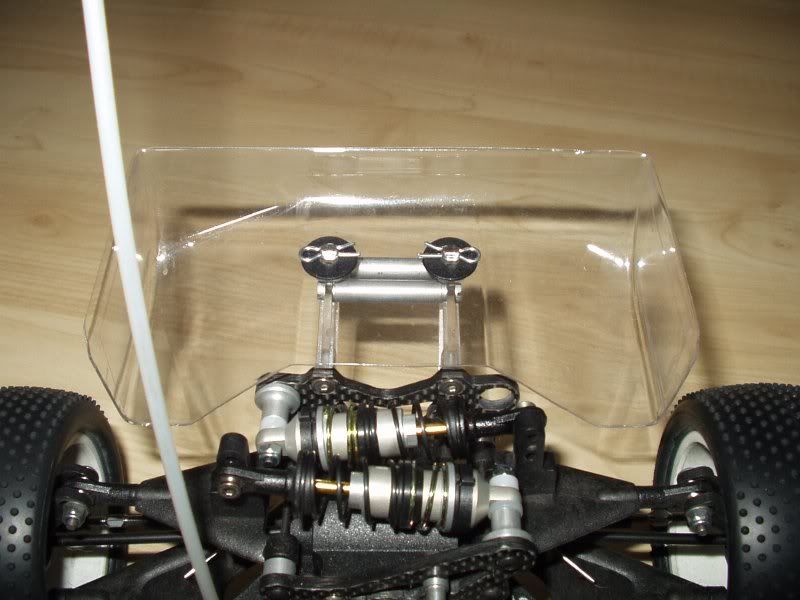
No. 5 Make (i did) or buy (not sure what where from though) some braces for the rear wing mounts. I fitted these to my P8 and never broke any wing mounts after fitting them. See pictures:   |
|
|
|
Post by Northy on Sept 26, 2005 19:39:05 GMT
No. 6
Drill the hole in the front wishbone for the push rod right through the wishbone and fit a longer screw that just sticks out of the bottom of the wishbone.
|
|
|
|
Post by YoKoMo-MX4 on Sept 28, 2005 0:39:10 GMT
While we are on the subject of the prop shaft... The end float that the manual talks about concerns me. I must be stupid, but where exactly is the float supposed to occur? It seems to me the only place it could occur is at the pinion/prop shaft joint (I don't know what the technical term would be) ... where the prop shaft ends engage the drive pinions. Is this correct or am I not understanding something?
Right now, if the prop shaft is ‘snugged’ into the 1-way sleeve and slipper hub, it has just over 1mm of float. Assuming this is the proper place to have end float, is 1mm enough? Or do I need to hack on the prop shaft to slack that a bit?
Thanks in advance.
'nuff said,
MX4
|
|
|
|
Post by Northy on Sept 28, 2005 18:10:15 GMT
Yeah, thats right, that's where the float will be. I know id doesn't seem ideal, but it works.  |
|
GAZ
New Member
 IF YOU WANT TO BEAT THE REST GET THE BEST
Posts: 24
|
Post by GAZ on Oct 1, 2005 1:30:32 GMT
I've just been building the diff's and fitting them to the chassis. In the manual it only shows the rear diff being shimmed, do you just do the rear or both front and rear. I have shimmed both anyway just incase but i just can't seem to get any play between the pinion and the diff gear with all four shims on the same side as the long outdrive.
Should i leave them as they are and let them bed in or add a few more shim's.
|
|
|
|
Post by YoKoMo-MX4 on Oct 10, 2005 18:21:40 GMT
Here is a brief tip when building the shocks (dampers). Use some Associated 'Green Slime' assembly lube on all of the o-rings. Northy had posted elsewhere that he replaced all of the shock shaft seals with blue MIP seals because of too much ' stiction' with the kit seals. I saw that post and made sure to compare the X10 kit seals with and without 'Green Slime' applied. The difference is dramatic. 'nuff said, MX4 |
|
|
|
Post by Northy on Oct 10, 2005 18:46:44 GMT
More tips:
No. 7
Apply a small amount of threadlock (a weak type that is ok to use on plastic) on to the M4 rocker crank pivots when screwing them into the gearbox top to stop them coming loose.
No. 8
Thread the carbon steering link through the chassis, then superglue a washer to the top side of it. This does two things, pushes the delrin pivot further into the steering arms (to stop them popping out) and strengthens the link.
No. 9
Drill a hole in the top of each gearbox top (above the crownwheel) to allow crownwheel teeth inspection and the addition of a little greese from time to time. You can cover the hole with a little tape, or side a rubber gromit to fit the hole.
|
|
|
|
Post by YoKoMo-MX4 on Oct 16, 2005 4:31:51 GMT
No. 10 At step 7 of the manual, toss the M3x12 flat head and M3x12 button head screws in favor of an M3x15 screw (what head is your choice, I used a 'socket cap' because that is what I had handy). This should give significantly better durability in the lower positions of the rear upright. The M3x12 screws do not penetrate the upright adequately and I found how easily this area would fail during my first test run  'nuff said, MX4 |
|
|
|
Post by Northy on Oct 16, 2005 10:22:10 GMT
No. 10B Don't bother with the two individual screws, drill the hole out to 3mm and fit a long bolt all the way through the rear upright with a nyloc nut on the end. Did this on the P8 and never broke a rear upright (after doing it). I meant to do it on the X10 but never got round to it. I wished I had when I glanced the wall on the straight flat out last night  |
|
|
|
Post by Northy on Oct 17, 2005 11:58:25 GMT
M3 x 40 and a dremel! ;D
Be careful with the screw head, make sure it and the nut don't rub on the inside of the wheel.
|
|
|
|
Post by martinpal on Nov 19, 2006 0:50:49 GMT
Shrink tape your steering link to prevent shorting your batteries when putting your batteries in..
|
|